


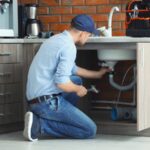


A dripping faucet is more than just an annoying sound—it’s a source of water waste, higher utility bills, and potential water damage if left unresolved. Fortunately, fixing a common drip is often a straightforward DIY repair that requires only basic tools and a bit of patience.
This guide walks you through the step-by-step process of diagnosing the type of faucet you have, identifying the worn-out component (like a washer, O-ring, or cartridge), and replacing it to restore a tight seal and quiet operation.
Dripping Faucet Fixes That Actually Work
What Are The Common Causes Of A Dripping Faucet?

A dripping faucet is usually a sign that one of the internal parts is no longer sealing the way it should. Even a slow drip often points to wear inside the faucet body, not just a handle that needs tightening. Over time, parts rub against each other, minerals collect from hard water, and small components break down from constant use. Once that seal weakens, water can slip through and drip from the spout even when the faucet is turned off.
Most dripping faucet problems come down to worn washers or O-rings, a failing cartridge, corrosion around the valve seat, or water pressure that is higher than the faucet was built to handle. Understanding which part is likely responsible can make troubleshooting faster and help you avoid replacing the wrong pieces.
How Do Worn Washers And O-Rings Cause Faucet Leaks?
Washers and O-rings are small but important sealing parts, and they are one of the most common reasons a dripping faucet starts. In many older or compression-style faucets, a washer presses against a valve seat when you turn the handle off. That pressure creates the seal that stops water flow. After months or years of use, the washer can flatten, crack, or harden. When that happens, it no longer seals evenly, so water finds a path through and begins to drip.
O-rings usually sit around the faucet stem or handle assembly, helping prevent leaks around moving connections. Because they flex and shift with daily use, they can wear down, loosen, or dry out. If you notice water around the handle area as well as a dripping faucet at the spout, an O-ring issue becomes more likely. Visible cracking, brittleness, or a ring that no longer fits snugly are all signs it may be time for replacement. Swapping a washer or O-ring is often a straightforward fix, but getting the right size matters, since a slightly wrong fit can lead to continued leaking.
What Role Do Faulty Cartridges And Valve Seats Play In Drips?
Newer faucets often rely on a cartridge instead of a traditional washer system. The cartridge regulates water flow and helps control temperature in single-handle designs. When a cartridge wears out, becomes damaged, or gets clogged with mineral buildup, it may not close completely. That partial closure is enough to cause a dripping faucet, especially if the internal seals inside the cartridge have started to break down.
The valve seat is another common trouble spot, particularly in faucets where a washer presses against it. The valve seat is the surface inside the faucet that the washer seals against. Over time, mineral deposits and corrosion can roughen that surface, creating tiny gaps where water can pass through. If a new washer does not solve the dripping faucet, a worn or pitted valve seat can be the reason the leak continues. Regular cleaning and basic maintenance can slow this type of wear, but once corrosion is advanced, repairing or replacing the affected part may be necessary.
In some cases, water pressure plays a role too. If pressure is unusually high, it can make small sealing issues worse and cause a dripping faucet to show up sooner. If leaks happen often in multiple fixtures, pressure may be worth checking.
Which Types of Faucet Leaks Should Homeowners Identify?
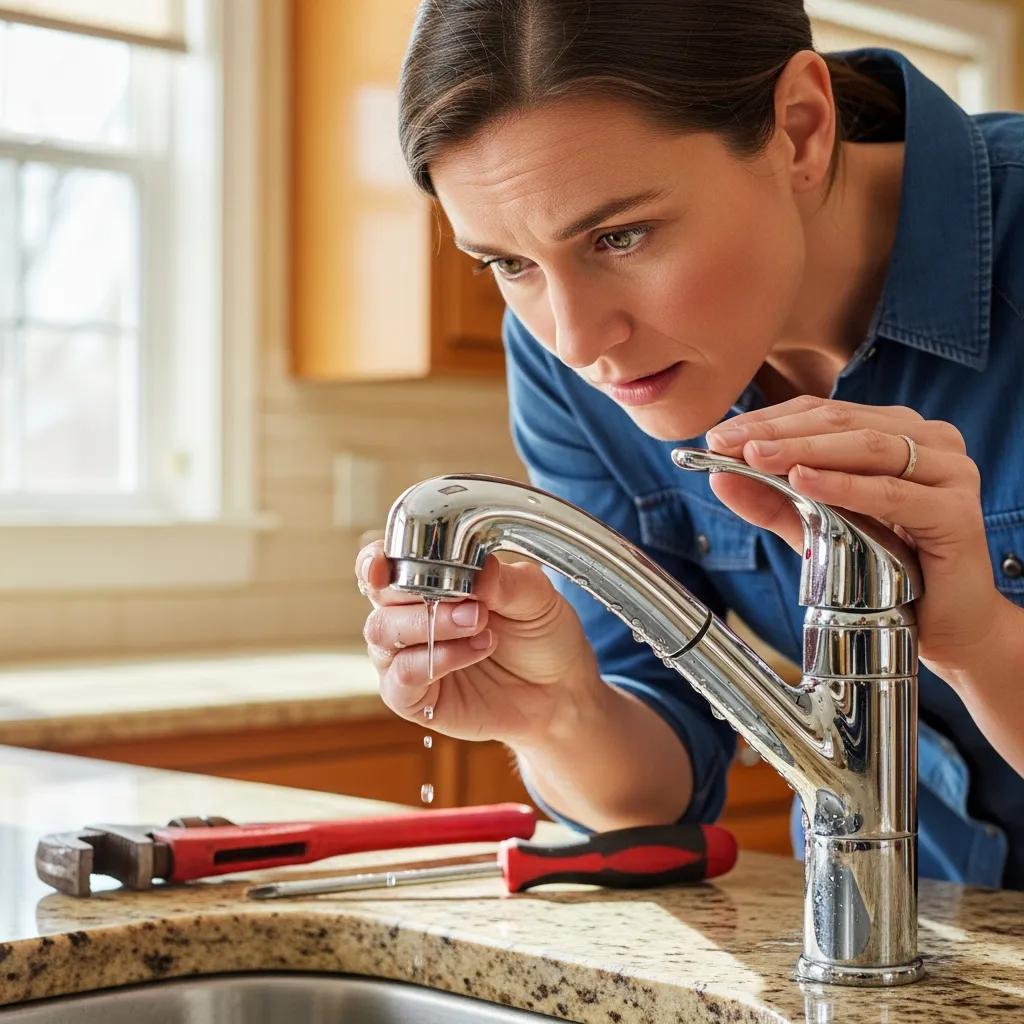
When a dripping faucet shows up, the first step is figuring out where the water is coming from. Not every leak is a drip from the spout. Some leaks happen around the handle, under the faucet base, or even beneath the sink where supply lines connect. Identifying the leak type helps you narrow down which parts are failing and what kind of repair is actually needed. It also keeps you from replacing components that are not causing the problem.
Homeowners typically run into three main faucet leak types: spout leaks, handle leaks, and base leaks. Under-sink leaks are also common, but they can be harder to spot because the water is not always visible until it has already caused damage. A quick inspection when you notice a dripping faucet can save time and help you avoid bigger issues like cabinet rot or mold.
How To Recognize Spout, Handle, And Base Leaks
A spout leak is the classic dripping faucet problem. You turn the faucet off and water still drips from the spout. This often points to worn internal seals, a failing cartridge, a damaged washer, or corrosion around sealing surfaces. Spout drips can range from occasional to constant, but even a slow drip matters because it usually gets worse with time.
A handle leak shows up when water seeps around the handle itself or around the handle base when the faucet is running, or sometimes even when it is off. This type of leak is commonly tied to worn O-rings, loose packing nuts, or seals that have dried out. If the handle area feels damp or you notice water collecting near the top of the faucet, it is likely not just a dripping faucet at the spout. It is a separate leak point that needs a different repair.
A base leak is easier to identify because you will see water pooling or spreading around the bottom of the faucet where it meets the sink or countertop. Sometimes the water appears only when the faucet is running, especially if the leak is tied to the seal at the base or the supply connections beneath. Other times, water creeps out slowly after use and leaves a ring or dampness that never fully dries. Base leaks can be tricky because the water does not always come from the base itself. It can run down from above and collect there, so it helps to dry everything first, then run the faucet and watch carefully.
What Are Signs Of Under-Sink Faucet Leaks?
Under-sink leaks are often missed because the water stays inside the cabinet. Over time, though, the signs become clear. You might see water stains or swelling on the cabinet floor, peeling laminate, or a damp spot that returns even after drying. A musty smell is another warning sign, especially if moisture has been sitting long enough to encourage mold growth.
If you suspect a hidden leak, check the shutoff valves, the supply lines, and the drain connections while the water is running. Sometimes a dripping faucet issue at the spout is paired with a slow under-sink leak, especially in older setups where multiple seals have worn down. A simple habit of looking under the sink now and then can help you catch these problems early, before they turn into expensive repairs.
Accurate leak identification is the foundation for fixing a dripping faucet the right way. Once you know whether the leak is coming from the spout, handle, base, or beneath the sink, you can focus on the most likely parts and avoid unnecessary work.
How Can You Fix a Dripping Faucet Yourself?
A dripping faucet is one of the most common home plumbing problems, and it is often something you can handle on your own if the leak is coming from a worn seal or a loose internal part. The key is taking a little time to identify the faucet type and working carefully so small parts do not get lost. Many repairs come down to replacing a washer, an O-ring, or a cartridge, which are inexpensive parts that wear out over time from normal use.
Before you start, it helps to clear the area around the sink and plug the drain so screws or small pieces do not fall in. Keeping a towel nearby and taking a quick photo of the faucet as you disassemble it can also make reassembly much easier.
What Tools And Supplies Are Needed For DIY Faucet Repair?
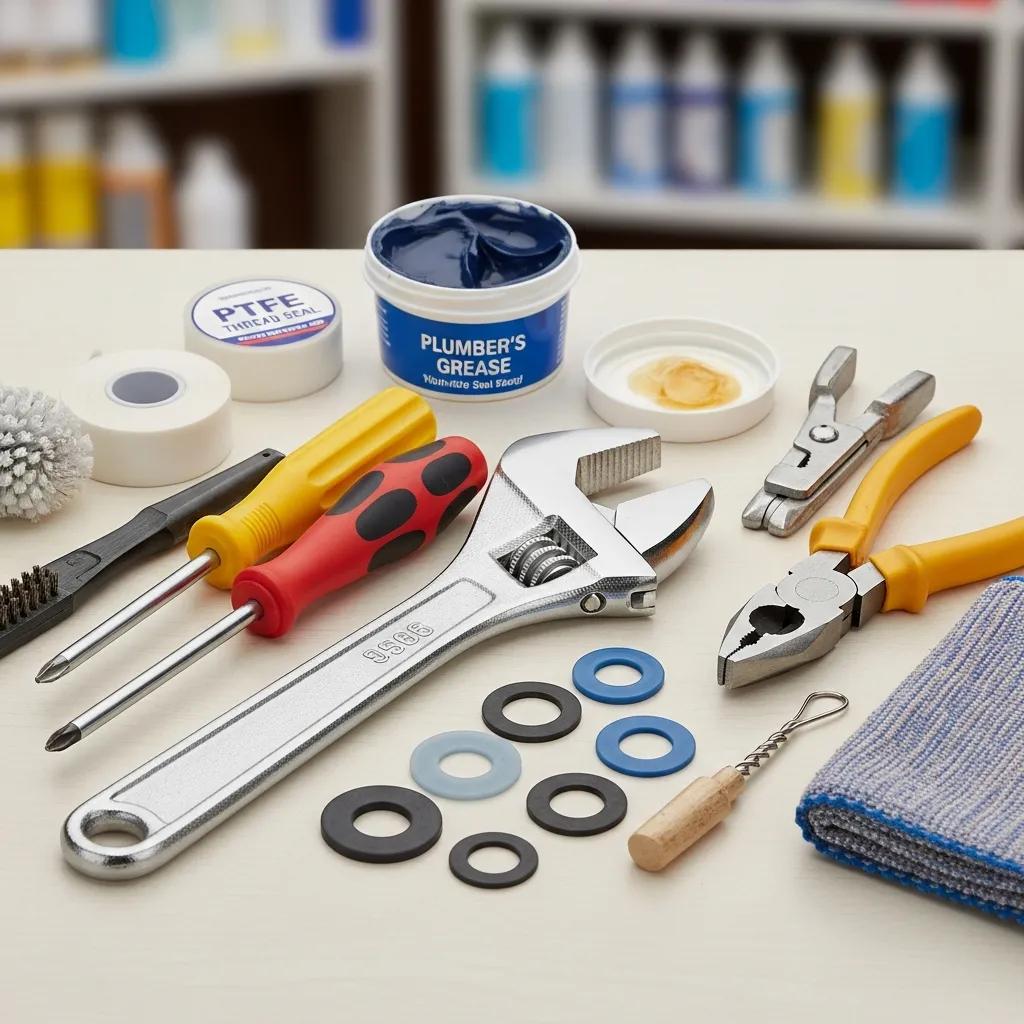
Most dripping faucet repairs can be done with basic tools. An adjustable wrench is useful for loosening and tightening fittings, especially if parts are stuck from mineral buildup. A screwdriver is usually needed to remove handle screws and trim pieces. Depending on the faucet style, you may also need a set of Allen keys, since some handles are secured with small set screws.
Replacement parts matter just as much as tools. Many dripping faucet issues are caused by worn washers, O-rings, or a failing cartridge. The part you need depends on whether the faucet is a compression, ball, cartridge, or ceramic disc style. If you are not sure which type you have, removing the handle and checking the internal assembly can provide clues, or you can bring the old part to a hardware store to match it.
Plumber’s grease is also helpful because it lubricates new O-rings and seals, allowing them to seat properly and move smoothly. Avoid using petroleum jelly since it can damage certain rubber components over time. It is also smart to have a small cloth or old toothbrush on hand for cleaning off mineral buildup before putting the faucet back together.
What Are Step-By-Step Instructions For Replacing Washers And O-Rings?
Start by turning off the water supply under the sink. If there are no shutoff valves, you may need to turn off the main water supply for the home. Once the water is off, open the faucet to relieve pressure and confirm the water is fully shut down. This step prevents surprises and makes the repair less messy.
Next, disassemble the faucet. Remove the handle by taking off the decorative cap if there is one, then loosening the screw underneath. Lift the handle away to access the stem or cartridge assembly. If parts feel stuck, take it slow and avoid forcing anything, since older fixtures can crack or strip if handled roughly.
Once you are inside, locate the washer or O-ring that is likely causing the dripping faucet. Washers are often found at the base of a stem in compression faucets, while O-rings are commonly around the stem or handle area. Remove the worn part and compare it to the replacement to confirm the size matches. Before installing the new piece, clean away any buildup around the seating area, since grit or corrosion can prevent a tight seal. Apply a light coat of plumber’s grease to the new O-ring or washer to help it seat and reduce friction.
Reassemble the faucet in the reverse order and turn the water back on slowly. Once the water is restored, test the faucet by running it, turning it off, and watching for any continued dripping faucet symptoms. If the leak persists, the issue may be a worn cartridge or a damaged valve seat rather than just a washer or O-ring. Even then, the process you followed still helps because you have already ruled out the most common causes and gained a clearer view of what needs attention next.
When Should You Call A Dripping Faucet Plumber In Northwest Georgia?
A dripping faucet is often a straightforward fix, especially when the issue is a worn washer, O-ring, or cartridge. Still, not every leak stays simple. Sometimes a drip is a symptom of a bigger problem, or the faucet is old enough that the parts are difficult to access without damaging something. Knowing when to stop troubleshooting and call a dripping faucet plumber can save you time, reduce frustration, and help prevent water damage that costs far more than the repair itself.
In Northwest Georgia, homeowners often try the quick fixes first, which makes sense. If the drip continues after a basic repair attempt, or if you notice other warning signs around the fixture, it is usually a good moment to bring in professional help.
What Are The Limits Of DIY Repairs And When Is Professional Help Needed?
DIY repairs are usually best for minor internal part replacements and simple tightening jobs. The limits show up when the leak will not stop after you have replaced the common wear parts. If a dripping faucet continues even after new washers or O-rings, the problem may be deeper, such as a worn valve seat, a damaged cartridge housing, or corrosion inside the faucet body. At that point, repeated part swaps often become a guessing game.
Corrosion is another reason DIY repairs can become risky. If you are dealing with a faucet that has mineral buildup and seized components, parts can strip or snap during disassembly. That can turn a small dripping faucet repair into a bigger replacement job. You should also take leaks more seriously when they are paired with water under the sink, soft cabinet flooring, staining, or a musty smell. Those signs suggest water has been escaping for a while and may have already started causing damage.
It is also worth considering professional help if you cannot locate the source of the leak. Water can travel along supply lines and drip in a different spot, making it look like the faucet is leaking when the issue is actually a loose connection or a failing shutoff valve. A plumber can pinpoint the source quickly and fix the right problem the first time.
How Does JW Plumbing Pros Provide Fast And Reliable Faucet Repair?
JW Plumbing Pros is based in Northwest Georgia and serves homeowners in areas such as Acworth, Dallas, Kennesaw, and Marietta. For a dripping faucet, the value of using a local plumbing provider is speed and accurate diagnosis. Instead of swapping parts one at a time, a plumber can identify whether the issue is a worn internal seal, a damaged valve seat, high water pressure, or a problem with the fixture itself.
A fast repair matters because a dripping faucet is not just an annoyance. Over time, constant dripping can waste a surprising amount of water and contribute to mineral staining, fixture wear, and moisture problems around the sink. When the leak is persistent, when corrosion is involved, or when you see signs of water damage, bringing in a dripping faucet plumber is often the most efficient path. It reduces trial and error and helps protect the surrounding plumbing and cabinetry, especially in older homes where one small leak can lead to bigger issues if ignored.
What Is The Typical Cost To Repair A Leaky Faucet In Northwest Georgia?
When a dripping faucet shows up, most homeowners want two things: a quick fix and a clear idea of what it might cost. Faucet repairs in Northwest Georgia can vary, but the price usually depends less on the drip itself and more on what is causing it. A simple internal part replacement is typically faster and less expensive than a repair involving corrosion, a damaged valve seat, or a fixture that needs to be replaced entirely.
It also helps to remember that not every dripping faucet is coming from the same place. A spout drip, a handle leak, and an under-sink leak can involve different parts and different amounts of labor. That is why two homes with “the same problem” can still end up with different repair costs.
Which Factors Influence Faucet Repair Pricing?
The first major factor is the type of faucet. Some faucets are designed with replaceable washers and O-rings that are easy to access. Others use cartridges or ceramic disc components that can take longer to diagnose and replace, especially if the model is older or requires a specific part. If the faucet is a specialty brand or has a unique design, the correct replacement part may cost more or take longer to source.
The extent of damage is another big driver of cost. If the dripping faucet is caused by basic wear, the fix is often straightforward. If corrosion is involved, parts can be stuck, the valve seat may be pitted, or the faucet body itself may be worn. In those cases, the repair may take more time, and in some situations replacement becomes the more practical option. Water damage around the sink can also add complexity, particularly if a leak has been dripping long enough to affect cabinets, flooring, or the shutoff valves.
Labor costs in Northwest Georgia can vary based on location, scheduling, and the complexity of the job. A quick repair that is easy to access is different from a situation where the plumber has to work in a tight space, remove seized fittings, or troubleshoot multiple possible leak points. Timing can matter too. If the issue is addressed early, it is often a simpler job. If it has been leaking for a long time, there is a higher chance of buildup and damage that increases labor.
How Does Professional Repair Save Money Compared To DIY?
DIY repairs can be cost-effective when you correctly identify the problem and replace the right part the first time. The risk is that a dripping faucet is not always caused by the most obvious component. Many homeowners replace a washer or O-ring, only to find the drip continues because the valve seat is damaged or the cartridge housing is worn. Buying multiple parts, making repeated trips for supplies, and spending time troubleshooting can add up quickly.
There is also the chance of accidental damage. Over-tightening fittings, stripping screws, cracking a handle, or damaging a shutoff valve can turn a simple dripping faucet repair into a larger problem. That is especially common with older faucets where corrosion makes parts harder to remove. A professional plumber can usually diagnose the leak source quickly, use the correct parts, and complete the repair without trial and error.
In the long run, professional repair can save money by preventing repeat leaks and reducing the chance of water damage under the sink. If the dripping faucet is persistent, if corrosion is visible, or if there are signs of moisture in the cabinet, having the issue diagnosed correctly early is often the most cost-effective choice.
How Can You Prevent Faucet Leaks And Water Waste At Home?
A dripping faucet is one of those household problems that seems small until it becomes constant. Even a slow drip can waste water over time, raise utility costs, and lead to mineral staining around the fixture. The good news is that many leaks start with predictable wear, which means prevention is often about simple habits and a little routine maintenance. If you stay ahead of buildup and address small issues early, you can reduce the chances of a dripping faucet showing up again.
Prevention also makes repairs easier when they are needed. Faucets that are kept clean and serviced occasionally are less likely to have stuck parts or corroded connections, which is where many DIY repairs start to go sideways.
What Maintenance Tips Reduce Faucet Drips And Extend Lifespan?
A quick inspection now and then is one of the easiest ways to prevent a dripping faucet. Look for moisture around the handle, water pooling near the base, or a spout that drips after the faucet is shut off. Catching those signs early can keep a minor seal issue from turning into a bigger repair. It is also worth checking under the sink occasionally. Damp cabinet flooring, water stains, or a musty smell can point to a leak that is not obvious from above.
Cleaning the aerator is another simple step that helps. Aerators collect debris and mineral deposits that can affect water flow and pressure. When flow becomes uneven or pressure changes, it can contribute to stress on internal components. Removing the aerator and rinsing it, or soaking it briefly if buildup is heavy, helps keep water moving smoothly.
Replacing worn parts promptly also matters. Washers, O-rings, and cartridges are designed to wear out over time. If a handle starts to feel stiff, if you notice squeaking, or if the faucet needs to be turned tighter than usual to stop the water, those can be early signs that seals are wearing down. Handling those issues sooner can help prevent a dripping faucet from becoming a recurring problem.
How Does Hard Water Affect Faucets And What Are Solutions?
Hard water is a major contributor to faucet issues because it leaves mineral deposits behind as water dries. Over time, that buildup can clog aerators, coat internal parts, and roughen sealing surfaces. When seals cannot sit flush due to mineral deposits, small gaps form and leaks become more likely. Hard water can also make parts harder to remove during repairs, which increases the chances of stripping threads or cracking older components.
The most practical day-to-day solution is regular cleaning, especially around the spout, aerator, and handle areas where residue tends to collect. Wiping fixtures dry after use can also help reduce spotting and buildup, though that is not always realistic in a busy household.
For homes with persistent hard water issues, a water softener can reduce mineral content throughout the plumbing system. That can help protect faucets, showerheads, and appliances over the long term. Even without a softener, staying consistent with cleaning and aerator maintenance can go a long way toward preventing a dripping faucet.
Common Faucet Issues By Type And Typical Repair Ranges
Different faucet styles tend to fail in different ways, which can affect how repairs are handled. Compression faucets often develop leaks from worn washers, while cartridge faucets may drip when the cartridge wears out. Ball-style faucets can leak from worn seals and springs. Costs vary by situation, but homeowners often see rough ranges like these: compression faucet repairs commonly fall around $75 to $150, cartridge faucet repairs often land around $100 to $200, and ball faucet repairs can fall around $100 to $250 depending on access and parts.
In summary, preventing a dripping faucet is mostly about reducing wear and buildup before it becomes a leak. With occasional checks, basic cleaning, and timely part replacement, you can extend the life of your fixtures and avoid the water waste that comes with ongoing drips. waste and ensure the longevity of your fixtures.
Conclusion
Fixing a dripping faucet is a manageable DIY task that can save water and money. However, if you encounter corroded parts, stripped screws, or if the leak persists, it’s time to call a professional.
For fast, reliable repairs that ensure a perfect seal and prevent future damage, trust the licensed plumbing technicians at JW Plumbing Pros. Don’t let a small drip become a big problem. Call 770-635-5159 or request a free quote online today for expert faucet repair. We’re here to solve the leak and restore your peace of mind.